Monday 30 November 2009

Bettys Traditional Christmas Pudding

I can’t believe it is the beginning of December tomorrow! November has just flown by. I saw the Christmas Coco Cola advert last night. You know it’s nearly Christmas when that appears on the TV, and even though I’m not a coca cola fan I love the advert – it always makes me feel festive and brings back memories of excited anticipation of Christmas approaching when I was younger. What do any of you associate with the start of Christmas? Putting up your tree, a song or on the radio or a bite of your first mince pie? I personally began feeling rather festive when I backed my Christmas cake last weekend. If you haven’t baked yours yet, don’t worry there is still time.

This year I decided to also make a Christmas pudding, something I have never attempted before. For those of you who may not know, a Christmas pudding is a sort of cross between a Christmas cake and mincemeat (the kind found in mice pies not bolognaise!). Your soak your fruits in alcohol before using them, like a Christmas cake, but you then mix these into a spiced cake batter than contains suet, like mincemeat (vegetable suet). The mix is then placed into a pudding basin and part boiled, part steamed in a pan of water for several hours. This produces a very moist and soft pudding, that has all the flavours of Christmas cake only slightly more spongy and less densely fruited. The pudding is kept for several weeks to allow the flavour to mature and develop. Then on Christmas day the pudding is heated, doused in Brandy and set alight. The lights are quickly turned down and people ‘ohhh’ and ‘arrrrh’ as wispy blue flames dance around the pudding giving a spectacular end to the Christmas meal.

Last week I saw this recipe for a Christmas pudding in a supplement given away with the newspaper. It’s based (apparently) on the Christmas puddings they sell in Bettys of Taylors and Harrogate. I have always been impressed with their bread and cakes whenever I have visited and the pudding sounded quite straightforward so I decided to give it a go. The pudding does require 5 hours of boiling/steaming, but don’t let that put you off. As long as you check the water level a couple of times during cooking, it can be left to its own devises. The actually making of the pudding is very quick and easy.

Obviously I haven’t tasted it yet, but it looks very moist and smells very traditional, warming spices, boozy fruits and a hint of citrus. It doesn’t look all that appetising before you cook it, but it transforms into a lovely looking pudding after its steam session. It’s currently wrapped up tight and hidden away under the stairs until its big reveal on Christmas Day. I’ll try and catch a shot of it on fire to show you later. It’s just occurred to me how odd it sounds to want to purposely set food on fire!

I nearly forgot, don’t forget to give your Christmas cake its weekly feed of one tablespoon of your chosen booze. It appreciates some festive spirit too *groan* couldn’t resist!

Bettys Traditional Christmas Pudding
Ingredients

230g raisins
50g currants
75g sultanas
50g glace cherries
Zest of 1 lemon
Zest of 1 orange
100ml Brandy
15g flaked almonds
25g chopped hazelnuts (my addition)
50g vegetable suet
30g wholemeal breadcrumbs
50g plain flour
90g light soft brown sugar
½ tsp mixed spice
¼ tsp nutmeg
¼ tsp cinnamon
¼ tsp ground cloves
1 tsp salt
2 eggs, lightly beaten

Method
The day before, place all the dried fruits into a bowl. Grate the orange and lemon zest over the top and pour in the Brandy. Give everything a good stir, cover the bowl with clingfilm and set aside for 24 hours to allow the fruits to plump up and absorb some of the Brandy.
The next day, place all the remaining ingredients into a large bowl. Add the soaked fruits, scraping in any leftover juices. Mix together lightly with a wooden spoon until everything is evenly combined.
Place a small disc of parchment paper in the base of a 1½ pint pudding basin. Fill the basin with the pudding mix, pressing down lightly. Place another disc of parchment on top and cover the top of the basin with a sheet of foil. Fold a little crease into the middle of the foil to allow it to rise with the steam.
Tie a long strip of string around the top rim of the pudding and then secure it over the top of the basin from one side to the other to form a string handle. (This will help you retrieve the pudding from the pan later without burning yourself).
Place a trivet or small unturned saucer in the base of a deep saucepan – it must be wide enough to hold your pudding.
Place the pudding on the upturned saucer, boil the kettle and fill the pan with the hot water until it reached half way up the side of the pudding basin.
Bring the water to a boil, then reduce to a simmer, cover with the lid and leave to simmer gently for 5 hours. It does not need to boil rapidly.
Every 2 hours lid the lid of the pan to check the water level. Add more boiling water if it’s looking low.
Once the 5 hours is up, lift the pudding out of the pan with the help of the string handle. Place on a cooling rack, remove the foil and leave until cool. Leave it in the basin and with the parchment disc still on top. Once cooled, wrap tightly in clingfilm and store in a cool dark place until required, the longer the better.
On Christmas Day, steam the pudding again for 2 hours to heat through thoroughly. Turn out onto a serving plate that has a rim. Carefully warm a ladleful of Brandy until it ignites and quickly pour it over the pudding to flambé. Take it to the table and serve with Brandy butter or custard once the flames have extinguished. Alternatively, heat the Brandy in a pan, pour it over the pudding and set light to it with a lighter.
Makes 1 pudding, to serve 6 – 8 people

Friday 27 November 2009

Daring Bakers November 09 Challenge: Chestnut Ricotta Filled Cannoli

The November 2009 Daring Bakers Challenge was chosen and hosted by Lisa Michele of Parsley, Sage, Desserts and Line Drives. She chose the Italian Pastry, Cannolo (Cannoli is plural), using the cookbooks Lidia’s Italian-American Kitchen by Lidia Matticchio Bastianich and The Sopranos Family Cookbook by Allen Rucker; recipes by Michelle Scicolone, as ingredient/direction guides. She added her own modifications/changes, so the recipe is not 100% verbatim from either book.

Cannoli are known as Italian-American pastries, although the origin of cannoli dates back to Sicily, specifically Palermo, where it was prepared during Carnevale season, and according to lore, as a symbol of fertility. The cannoli is a fried, tube-shaped pastry shell that is faintly flavoured with an interesting combination of cocoa powder, cinnamon and Marsala wine. Once fried they are filled with a creamy sweetened ricotta cheese and usually accompanied by chocolate, candied fruit and/or nuts. However, there is no reason why cannoli can’t also be filled with pastry creams, mousses, whipped cream, ice cream. Wine may sound an off ingredient to add to a dough but it is not only added for flavour, but also to relax the gluten in the dough which makes it easier to work with.

We were allowed to flavour our ricotta filling any way we wished and I decided to add chestnut puree to mine, as I love the flavour of chestnuts and they feel suitable festive for this time of year. The chestnut ricotta turned out very light and plesently creamy. It a very fresh young cheese meaning it wasn’t too rich which was ideal when paired with the fried dough. The chestnut flavour tasted wonderful against the faintly cinnamon cocoa flavoured dough and I also topped the cannoli with a few dark chocolate chips to finish.
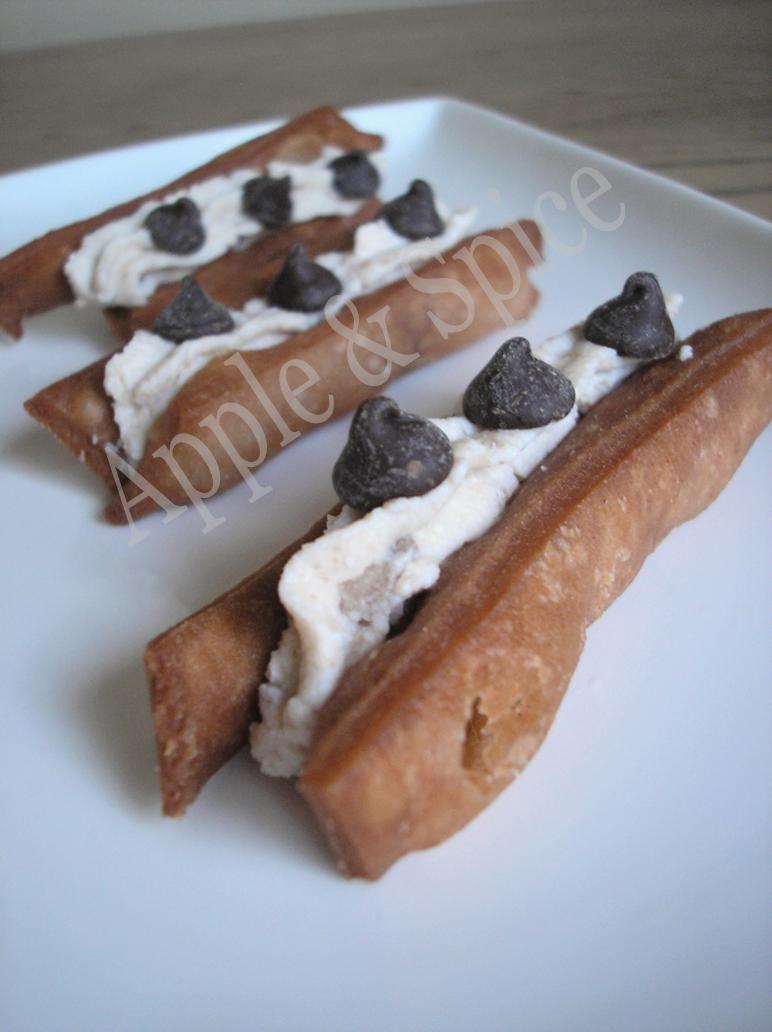
Once the cannoli dough is made and rested it is rolled out until very thin before squares or circles are cut out and rolled around special cannoli moulds and then deep fried. I didn’t have any cannoli moulds, nor could I find any in the two kitchen shops I visited. I decided to try improvising my own by using the middle thick cardboard tube from the end of my clingfilm. It seemed the right sort of size and very study and I was able to get four good tubes from it. I felt quite pleased with my ingenuity and hoped it would work. I wrapped my dough around the tubes and dropped them into the hot oil. They dropped to the bottom of the pan then rose to the surface and started to sizzle – hurrah it worked – or so I thought. The dough stayed around the tubes for about 5 seconds before suddenly puffing up and springing free from the tubes into weirdly shaped blobs. Well darn. Strangely enough they also puffed up and became hollow, like very fragile fried profiterole shells. I’ve no idea why this happened but it did offer me a solution of how to fill my cannoli so it wasn’t a total loss.

I also fried the offcuts in little strips which I sandwiched together with more of the chestnut ricotta. These worked really well as they were easier to eat than my cannoli puffs. I enjoyed this challenge as I have never made…well attempted to make my own cannoli before. Both the cannoli shells and the chestnut ricotta filling were delicious. I’ll give it another go when I find some proper cannoli moulds. Thanks Lisa for choosing such a fun challenge. Click here to see Lisa’s perfect looking cannoli and for a list of other Daring Bakers.

Chestnut Ricotta Filled Cannoli
Cannoli Dough
250g plain flour
28g caster sugar
1 tsp cocoa powder
½ tsp ground cinnamon
½ tsp salt
3 tbsp vegetable or olive oil
1 tsp white wine vinegar
60ml sweet Marsala (or any white wine)
1 egg white
2 litres vegetable oil or any neutral oil for frying

Ricotta Filling
500g ricotta cheese, drained
50g icing sugar
1 tsp vanilla extract
110g chestnut puree
35g dark chocolate chips

Method – Cannoli
In the bowl of an electric stand mixer or food processor, combine the flour, sugar, cocoa, cinnamon, and salt. Stir in the oil, vinegar, and enough of the wine to make a soft dough. Turn the dough out onto a lightly floured surface and knead until smooth and well blended, about 2 minutes. Shape the dough into a ball. Cover with plastic wrap and let rest in the fridge from 2 hours to overnight.
Cut the dough into two pieces. Keep the remaining dough covered while you work. Lightly flour a large cutting or pastry board and roll the dough until very thin, about 1/16 to 1/8” thick (An area of about 13 inches by 18 inches should give you that). Cut out 3 to 5-inch circles (that will fit around your moulds). Roll the cut out circle into an oval, rolling it larger and thinner if it’s shrunk a little.
Oil the outside of the cannoli tubes (You only have to do this once, as the oil from the deep fry will keep them oiled). Roll a dough oval from the long side (If square, position like a diamond, and place tube/form on the corner closest to you, then roll) around each tube/form and dab a little egg white on the dough where the edges overlap. (Avoid getting egg white on the tube, or the pastry will stick to it.) Press well to seal. Set aside to let the egg white seal dry a little.
In a deep heavy saucepan, pour enough oil to reach a depth of 3 inches, or if using an electric deep-fryer, follow the manufacturer's directions. Heat the oil to 190C on a deep fry thermometer, or until a small piece of the dough or bread cube placed in the oil sizzles and browns in 1 minute. Have ready a tray or sheet pan lined with paper towels or paper bags.
Carefully lower a few of the cannoli tubes into the hot oil. Do not crowd the pan. Fry the shells until golden, about 2 minutes, turning them so that they brown evenly.
Lift a cannoli tube with a wire skimmer or large slotted spoon, out of the oil. Using tongs, grasp the cannoli tube at one end. Very carefully remove the cannoli tube with the open sides straight up and down so that the oil flows back into the pan. Place the tube on paper towels or bags to drain. Repeat with the remaining tubes. While they are still hot, grasp the tubes with a cloth and pull the cannoli shells off the tubes with a pair of tongs, or with your hand protected by an oven glove or towel. Let the shells cool completely on the paper towels. Place shells on cooling rack until ready to fill.
Repeat making and frying the shells with the remaining dough. If you are reusing the cannoli tubes, let them cool before wrapping them in the dough.

For the Ricotta Filling
Line a sieve with a cheesecloth or sheet of kitchen roll. Place the ricotta in the sieve, over a bowl, and cover with a saucer. Weight it down with a heavy can, and let the ricotta drain in the refrigerator for at least 2 hours or overnight.
Once drained, beat the ricotta until smooth and creamy (mine didn’t go smooth, but it was creamy). Beat in the icing sugar, vanilla and chestnut puree and mix until smooth. Cover and chill until required.

To Assemble
Fill a pastry bag with the ricotta cream. Insert the tip in the cannoli shell and squeeze gently until the shell is half filled. Turn the shell and fill the other side. You can also use a teaspoon to do this, although it’s messier and will take longer.
Press or dip the ends of the cannoli in the chocolate chips. Dust with a little extra icing sugar and serve straight away.
Leftover cannoli can be kept in an airtight container lined with kitchen roll. Do not fill the cannoli until required or else they will go soft.
Makes 22-24 cannoli
NOTE: The canolli shells can also be baked at 220C for 7-10 minutes until golden. However, they won’t be as nicely blistered compared to if they had been fried.

Wednesday 25 November 2009

Festive Christmas Cake

Sorry for the delay in posting the next stage of the Christmas cake, things have been a bit hectic these last few days, but rest assured your soaking boozy fruit base won’t have come to any harm. The fruit should be plump, glossy and juicy by now and perfect for stirring into your Christmas cake mix to give a rich, moist texture and flavour. Peel off the clingfilm and inhale the fruits sweet, boozy, citrusy aroma, ahhh…it’s just heavenly.

When you have added the fruit to the cake mix just run a finger around the fruit bowl and taste the syrupy residue, it’s divine. The harsh raw note of the alcohol has mellowed and taken on the flavour of the fruits. The juices have become sweet and sticky while a wonderful rich fruity citrus flavour seems to explode in your mouth. It was hard to resist the urge to start eating the raw mix.

The cake mix is very easy to put together and contains its own Christmassy flavours of black treacle and an assortment of spices. This year I added ginger and cloves to help complement my choice of fruits. When you come to add the soaked fruit, you may think there is not enough cake mix for the amount of fruit, but a Christmas cake such as this is very densely fruited. Just think of it as the fruit being held together with cake, rather than it being a cake containing fruit.When spooning the cake mix into the tin it’s a good idea to create a little hollow or dip in the centre of the cake, this compensates for the cakes normal doming effect during baking and means you should end up with more of a flat surface on which to decorate later – we don’t want to have to cut off and waste any more of the cake than necessary!

During baking the cake will fill your kitchen with wafts of warm Christmas smells that linger pleasantly for several hours. Once baked, the cake is given its first ‘feed’ of some more Cointreau before being wrapped up tight. The cake will now be fed once a week until it’s time to decorate it just before Christmas. This ensures it continues to develop in flavour and stays moist – no chance of dry stale fruitcake here!

Festive Christmas Cake Base
Ingredients
225g plain flour
1½ tsp mixed spice
½ tsp ground ginger
½ tsp ground cloves
40g ground almonds
40g balanced almonds
165g light soft brown sugar
165g butter
1 tbsp black treacle
3 eggs
1 batch pre-soaked festive fruit mix (click to see)

Feeding
2 tbsp Cointreau (orange liqueur)

Method
Grease and line base and sides of a deep 8inch/20cm tin with greaseproof paper, allowing the paper to rise an inch above the rim of the tin.Pre heat the oven to 140C.In a large bowl add the flour, mixed spice, ground almonds, sugar, butter, treacle and eggs and mix together well using an electric mixer.Roughly chop the blanched almonds and add to the mix along with your pre-soaked boozy fruits.
Fold everything together using a spatula, making sure the fruit is evenly distributed.Spoon the mixture into the prepared tin, pressing down gently and smoothing the surface. Create a shallow dip in the centre of the cake mix to compensate for the cake doming in the oven. The dip should result in a flat surface when baked.Bake the cake for 2 hours and 50 minutes. (After 2 hours you can quickly cover the tin with foil if it is becoming too brown before baking for a further 50 minutes).Check the cake with a skewer, which should come out clean. Leave to cool for an hour in the tin.Measure out the Cointreau into a small bowl and prick the top of the cake all over with the skewer. Evenly drizzle over the Cointreau using a teaspoon.Allow the cake to cool completely before removing it from the tin but leaving the greaseproof paper on.Wrap it up well in clingfilm and leave in a cool dark place to mature for several weeks. ‘Feed’ the cake with an extra tablespoon of Cointreau once a week until required or ready to marzipan and ice just before Christmas.
Makes enough for an 8inch/20cm circular Christmas cake


Here is what I have been up to recently – my graduation! When I first started Uni I wasn’t sure it was really for me and a little part of me that never imaged I would actually get to wear the graduation robe - it felt like such an achievement to know I succeeded and it was a great day.

Sunday 22 November 2009

Stir Up Sunday - Festive Fruit Cake Mix

Today is stir up Sunday which means its time to dust off your pudding basins and hunt out your dried fruit as today is the traditional day to make your Christmas pudding and Christmas Cake. It’s called ‘stir up’ for the obvious reasons that you stir together your fruit mixes and it’s always held on the last Sunday before the start of Advent (next week) to acknowledge the start of the festive food preparations. This then gives your cakes and puddings four weeks to mature, develop in flavour and be ‘fed’ with Brandy or other spirits to give them that characteristic richness, moistness and boozy flavour.

Every year I bake the same Christmas cake recipe that I have tailored to suit my families tastes, but this year I felt like doing something a bit different and by simply changing some of the fruits included and the tray of soaking liqueur I’m hoping to end up with a different twist on my much loved classic. Below is the fruit base for the Christmas cake I’m baking this year but click here to see last years more traditional cake mix. The baking of the cake is to come!

I prepared and soaked the fruit for my Christmas cake yesterday, in readiness for baking today and I will be preparing my Christmas pudding mix today. It’s a fun festive tradition and I just love the colours and festive aromas you encounter along the way. Baking your own is so satisfying and rewarding that I encourage everyone to start up and stir up!

Festive Fruit Cake Mix
Ingredients

100g dried cranberries
75g glace cherries
175g dates
85g dried apricots
175g dried figs
½ Bramley apple
100g raisins
40g glace stem ginger
Zest of an orange
Zest of a lemon
2 tbsp Cointreau (orange liqueur)

Method
In a large mixing bowl place the cranberries and raisins. Quarter the cherries and add to the bowl.
Use a pair of scissors to chop the figs, apricots and dates into small pieces, similar in size to the quartered cherries.
Peel, core and dice the apple into ½ cm cubes. Finely chop the glace stem ginger.
Grate over the zest of the orange and lemon and drizzle over the Cointreau.
Give everything a good stir before covering with cling film and leaving to soak, plump up and macerate overnight.
Makes enough for an 8inch circular Christmas cake

Friday 20 November 2009

The Cake Slice November 09: Burnt Sugar Cake

This months winning cake was a burnt sugar cake. The name alone instantly makes me think of bonfire night and sticky toffee apples. Burnt sugar cake encompasses all the scent and flavour of a deep golden caramel (burnt sugar) however, it is not called ‘caramel cake’ as this is often a white cake with caramel frosting, whereas this burnt sugar cake makes use of a golden caramel syrup which is infused into both the frosting and cake batter to give an intense flavour and aroma, the perfect cake for autumn.

I’ll let you in on a secret, I’m not a great fan of caramel. I don’t mind a little paired with other things but caramel on its own is just too sickly sweet for my liking and this cake sounded very very sweet. In order to tone down the caramel element, I decided to add a cinnamon spiced apple filling to my cake as apple and caramel are great flavour pairings. I used a sharp Bramley apple which helped combat the sweetness and made the finished cake taste rather like an apple tart tatin, only in cake form.

For the apple filling I lightly cooked the Bramley apple slices in a little butter until just beginning to soften before scattering over some cinnamon sugar which gave them a lovely bronzed look and made them smell wonderful.

A caramel syrup is required to add into the cake batter and frosting, and although this can sound rather daunting, it was quite simple. The sugar is first melted into a golden sugar goo, before boiling water is added and the goo turns into a glossy caramel syrup. I had never made a caramel where you add boiling water after the sugar has melted, but it worked well and resulted in a lump free syrup. My only advice would be to stand back when you add the boiling water, as the molten sugar is a lot hotter than the water and it foams up a bit as the temperatures collide, but it soon settles down again. It turned out crystal clear and such a deep amber colour that it almost looked red.

I didn’t have the right sized circular cake tins the recipe called for and so I baked my cake in two 8½ inch square tins instead. I was happy about this and everything was going well until I went to check on the cakes about half way through their baking time and that was when I saw DISASTER HAD STRUCK! One of the cake tins had a loose bottomed base and was rather ancient. It seems the base was no longer secure as the batter had gone soft and gooey in the heat of the oven and started to ooze its way out of the base and all over the bottom of the oven! I don’t mean a little bit, I mean over half the mixture was now burning into gloopy mound on the base of the oven. ARGGG! I quickly wrenched open the oven door and scooped the molten mass out onto a baking tray before it could start smoking and wrapped the dripping cake tin in foil, stuck it onto another baking tray and put it back in the oven and hoped for the best. All the door opening meant my other cake layer sank slightly in the middle… it was not going well. I ended up with one very thin cake layer and one cake layer with a dip in the middle.

I decided to make the best of it and assembled my cakes, being thankful of the apple filling which did wonders to hide the dip in one of the cakes. I filled and iced the cake with the caramel frosting and amazingly, considering the disaster that occurred, I don’t think it turned out too badly. As it had such an autumnal feel to it, I gathered some russet autumn leaves from the garden to scatter around the plate. Whew.

The cake itself was very pleasant, light and moist with a subtle caramel flavour which went wonderfully with the spiced apple. It tasted even better the second day once the apple juices had been absorbed into the cake. However, I found the frosting to be far too sweet. I think next time I would use a different one as all I could taste was sugar. I enjoyed making this cake despite its rather eventful baking session, afterall, life would be dull without a little excitement (although I could have done without having to scrub the oven!) Click here to see what my fellow Cake Slice bakers thought.

Burnt Sugar Cake
(Recipe from Southern Cakes by Nancie McDermott)
For the Cake
360g plain flour
1 tbsp baking powder
½ tsp salt
1 tsp vanilla extract
225ml milk
200g butter
370g caster sugar (I used 300g)
4 eggs
110ml Burnt Sugar Syrup (below)

For the Burnt Sugar Syrup
225g caster sugar
225ml boiling water

For the Burnt Sugar Frosting
375g icing sugar
110ml Burnt Sugar Syrup (above)
50g butter
½ tsp vanilla extract
2 – 3 tbsp evaporated milk or normal milk

For the Apple Filling (my own addition)
1 Bramley apple
20g butter
1 tbsp caster sugar
½ tsp cinnamon

Method – Burnt Sugar Syrup
Heat the sugar in a cast iron skillet or another heavy bottomed pan with high sides. Heat over a medium-low heat, stirring occasionally, until the sugar melts into a clear brown caramel syrup. It should be the colour of tea. Gradually add the boiling water, pouring it down the sides of the pan so that if the syrup foams and bubbles up, you should be protected.
Continue cooking, stirring often, until the water combines with the syrup and turns a handsome brown syrup. Remove from the heat and set aside to cool. Store the cooled syrup in a sealed jar if not using straight away.

Method - Cake
Heat the oven to 180C. Grease and flour two 9 inch round cake pans.
In a medium bowl, combine the flour, baking powder and salt and stir with a fork to mix well. Stir the vanilla into the milk.
In a large bowl, beat the butter and the sugar with an electric mixer at high speed for 2 – 3 minutes, until they are well combined. Stop now and then to scrape the bowl down. Add the eggs, one by one, beating well each time. Pour in 110ml of the burnt sugar syrup and beat well. Add a third of the flour mixture and about half of the milk, beating at a low speed, until just incorporated. Mix in another third of the flour and the rest of the milk. Finally, add the remaining flour.
Divide the batter between the cake pans and bake at 180C for 20 to 25 minutes until the cakes are golden brown, spring back when touched gently in the centre and begin to pull away from the sides of the pan. Let the cakes cool in the pans on a wire rack for15 minutes. Turn out the cakes into the wire rack to cool completely.

Method – Burnt Sugar Frosting
In a large bowl, combine the icing sugar, the burnt sugar syrup, butter and vanilla. Beat with a mixer at medium speed for 2 to 3 minutes, scraping down the bowl now and then to bring the ingredients together. Add 2 tablespoons of the milk and continue beating until the frosting is thick, soft, smooth and easy to spread. Add a little more sugar if it is thin, and a little more milk if it is too thick.

Method – Spiced Apple Filling
Mix the sugar and cinnamon together in a small bowl. Peel, quarter and core the Bramley apple and cut into ½ cm slices. Melt the butter in a large frying pan and add the apple slices. Cook for 1-2 minutes until just beginning to soften. Carefully turn over onto the uncooked side and scatter over the cinnamon sugar. Cook for 1 minute more before removing from the heat and leaving the apple to cool in the pan before using.

To Assemble
Place one layer, top side down, on a cake stand or serving plate. Scoop a third of the frosting onto the cake and spread to the edges. Gently arrange the cooked apple slices evenly over the top cover with the second cake layer. Frost the sides of the cake, and then the top until it is evenly covered.
Makes one 9 inch round cake

Wednesday 18 November 2009

Spiced Sweet Potato Cake (Version 2)

This is my second attempt at a sweet potato cake. As you can see it looks drastically different to version 1.

The first thing you will notice is that it looks a lot bigger, more of a loaf shape. This is because I used slightly more mixture and baked in into one large cake rather than two smaller ones. I also ensured it really was fully cooked this time, meaning it rose beautifully and stayed that way! If you compare it side by side with version 1, you might think that I have burnt it, but rest assured its not burnt, I replaced some of the sugar with brown sugar in the hope of giving it a caramel overtone and this made the batter much darker, as you can see from the inside crumb.

The cake also contained oil rather than butter and I threw caution to the wind and mixed most of the ingredients together in one go, cutting down some of the process stages. This worked well and didn’t seem to have any negative effects on the cake. I loved the orange and spice mix from version 1 so much that I transferred those over into this cake as well.

The finished cake rose well and was light in texture. The crumb was soft and moist thanks to the oil and sweet potato and it had a very nice, faintly orangey flavour with caramel overtones. However, I think some of the magic of the orange, spices and sweetness from the sweet potato was lost by adding the brown sugar, as they were not as pronounced as in the first version. The lovely golden orange colour was also lost, which was a shame as I consider its sunny colour one of the most pleasing aspects of baking with sweet potato. This does not however prevent it from being a delicious and tasty cake and if I was not doing a comparison I would probably not find fault with it, so don’t let my judgements stop you from giving it a go.

I now had two different sweet potato cakes to try out on my friend. I told her I had been experimenting with spice cakes and invited her round for a tasting. She happily ate slices of each while considering them. In the end she told me that while she liked both cakes she preferred the flavour of version 1, but the height and lightness of version 2 (same as me – hurrah!) When I told her what the mystery ingredient was she was surprised and said it didn’t taste like sweet potato. As she had already said she liked both cakes, she had to eat her words and grudgingly agreed that vegetables and squashes may in fact have a place in baking. So even thought I may need to create a sweet potato cake version 3 to get my ideal cake, at least I achieved what I set out to do which is to broaden my friends mind to the possibilities of baking ingredients.

I have got quite a lot of cake(s) left over and I’ve got an idea forming of what to do with them, I’ll let you know if it works!

Spiced Sweet Potato Cake (Version 2)
Ingredients

240g plain flour
1 tsp bicarbonate of soda
½ tsp baking powder
130g sweet potato, cooked and mashed
1 tsp vanilla extract
100ml sunflower oil
2 eggs
100g caster sugar
100g soft brown sugar
Zest of ½ orange
1 tsp cinnamon
½ ground nutmeg
¼ tsp ground cloves20g pecans

Method
Preheat oven to 170C. Lightly grease and flour a 450g/1lb loaf tin.
Prick the sweet potato with a fork and microwave on high for 9 minutes until soft. Cut open, scoop out the flesh and mash with a fork. Weigh out the correct amount and set aside.
In a bowl, sift together flour, bicarbonate of soda, baking powder, and spices and set aside.
Place the sweet potato puree, vegetable oil, eggs, vanilla, orange zest and sugars into a large bowl and beat until well combined.Add flour mixture mix until just combined, a few small lumps are fine.
Spread the batter evenly into the loaf tin. Roughly chops the pecans and scatter over the surface of the batter.
Bake for 50 to 60 minutes until well risen and golden. A skewer inserted into centre of the loaf comes out clean. Cover the top quickly with foil after 45 minutes if you think it is browning too quickly.Cool the cake in the tin for 10 minutes before turning out onto a wire rack to cool completely.
Makes 1 loaf cake

Sunday 15 November 2009

Sweet Potato, Orange & Pecan Spice Cake (Version 1)

I was talking to a friend recently about the use of vegetables and squashes in cakes after we both watched a food programme that featured a chocolate beetroot cake. My friend was quite horrified by the use of beetroot and even more so when I told her that almost any vegetable could be used as a cake ingredient. She refused to believe that adding any vegetable would taste good in a cake, despite my protests that she already knew and liked carrot cake. I was determined to prove her wrong and surprise her with a piece of cake that contained a secret vegetable ingredient, but which one to choose? I thought it over and in the end settled on a sweet potato. They are not strictly a vegetable but neither are they a common cake ingredient and I thought their sweet flavour would be a good starting point. Now all that was left was to find the right recipe to bake with it.

After much hunting I decided to adapt a recipe for pumpkin cake that I found on Culinary Concoctions by Peabody blog. I also fiddled around with the quantities and added orange zest and spices which I thought would complement the sweet potato.

Everything went well and the resulting cake was very good. It was moist and a lovely golden yellow colour thanks to the sweet potato. The mix of orange and spices tasted fantastic and gave it a very autumnal feel. The chopped pecans added a nice crunch and they had got nice and toasty during baking. It rose well during baking but sank slightly as it cooled down with the result that the base was a little denser then I would have liked (I think 5 mins more would have been ideal – I’ve amended the recipe). All my family loved this cake, and it’s one I would certainly make again, but I wanted to experiment further, so I’m calling this sweet potato cake version 1, with version 2 to follow.

Sweet Potato, Orange & Pecan Spice Cake (Version 1)
Ingredients
1 small or ½ large sweet potato (130g cooked flesh)
180g plain flour
2 tsp baking powder
1 tsp cinnamon
½ tsp nutmeg
¼ tsp cloves
2 eggs, separated
150g and a separate 30g caster sugar
60g butter
1 tsp vanilla
140ml milk
Zest of ½ orange
40g pecans for decoration

Method
Preheat the oven temperature to 180C. Grease and line two small loaf tins.
Prick the sweet potato and microwave on high for 9 minutes.
When the sweet potato is cooked, scoop out the flesh and mash until smooth. Measure out 130g of potato puree and set aside.
Sift the flour, baking powder, cinnamon, nutmeg, and ground cloves. Set aside.
In a clean bowl, beat the egg whites until they form soft peaks. Gradually beat in the 30g of sugar and continue to whisk until the egg whites are fairly stiff.
In another bowl combine the sweet potato, butter, vanilla, orange zest and remaining 150g sugar. Beat until light and fluffy. Add the egg yolks one at a time, making sure to scrape the sides of the bowl after each egg yolk is added.
Add a third of the flour mix, followed by half the milk. Repeat with more flour, milk and ending with the last of the flour.
Using a spatula, fold in a third of the egg whites into the batter to lighten it. Carefully fold in the remaining egg whites until no streaks remain, but do not over mix and deflate the batter.
Spread the batter between the loaf tins. Roughly chop the pecans and scatter over the surface. Bake for 40 minutes or until a cake tester comes out clean. Let the cakes cool in the tins for 10 minutes before turning out onto a wire rack and leaving to cool completely.
Makes two small loaves.
Note: I think this mixture would also fit into one deep 450g/1lb loaf tin and would probably need around 50-60 minutes cooking time.

Saturday 7 November 2009

Bite Size Fruitcakes & Chocolate Truffle Squares for Afternoon Tea

As promised, here are the recipes for the other sweet treats I made for the afternoon tea party I had recently to accompany the macarons I made for this months Daring Bakers challenge. There was a selected of savoury sandwiches (including cucumber sandwiches with the crusts removed!), along with some of my favourite buttermilk scones served with clotted cream, jam and fruit, some bite size fruitcakes topped with marzipan flowers and some honeyed chocolate truffles served on tuile biscuit squares.

It made quite a spread and when rounded off with cups of freshly made tea and enjoyed in the company of friends and family it made for a most enjoyable afternoon. I do think it’s a shame that the tradition of afternoon tea has almost disappeared from our daily lives, but I for one vow to try and enjoy them at every possible occasion.

Bite Size Fruitcakes
You can’t have a traditional afternoon tea without the presence of fruitcake. As I was aiming for elegant food, I decided to experiment with baking the fruitcake mix in cannelĂ© moulds in order to make them bite size. This worked a treat and when topped with a little marzipan flower I think they turned out rather dainty. You could eat a couple while still leaving room to sample other things and baking them individually meant they cooked very evenly and stayed wonderfully moist.

This is a scaled down version of my favourite fruitcake recipe. However, don’t feel you have to stick to it religiously. If you run out of one or more of the fruits, dried cranberries, peaches, pears, prunes or dates also work well. If you don’t want to use brandy then you could use a spiced fruit tea or apple juice instead.

Bite Size Fruitcakes
Fruit Mix
60g raisins
60g sultanas
60g currants
25g dried apricots
35g glace cherries
Zest of ½ lemon
Zest of ½ orange
1 tbsp brandy

Cake Mix
75g plain flour
½ tsp mixed spice
15g ground almonds
55g soft brown sugar
55g butter
2 tsp black treacle
1 egg
Zest of ½ lemon
Fruit mix (above)

Method – Fruit Mix
Weight out the raisins, currants and sultanas into a bowl. Sort through the fruit a handful at a time, removing any stalks still attached to the fruit (these won’t be nice to crunch on).Cut the apricots and cherries into small pieces and same size as the raisins. Grate over the zest of the orange and lemon.Drizzle over the brandy, give everything a stir and then cover the bowl with clingfilm and leave for at least 4hours or preferably overnight to allow the fruit to absorb the brandy and plump up.

Cake Mix
Have two cannelé trays (around 35 moulds) ready to hand (you could also use mini muffin trays). Preheat the oven to 140C.Measure the lemon rind, flour, mixed spice, ground almonds, sugar, butter, treacle and egg into a very large bowl and mix together until smooth. (It will be quite stiff)Add the soaked fruits and mix everything together using a spatula, making sure the fruit is evenly distributed.Spoon the mixture into the cannelé moulds using a teaspoon. Fill almost to the top and press down gently to ensure no large air pockets remain trapped at the base.Bake for 25 to 30 minutes until the cakes are starting to come away from the sides of the pan and a small skewer inserted in the middle comes out clean.Allow the cake to cool in the moulds for 15 minutes before turning out onto a wire rack and leaving to cool.
Top with small marzipan flowers or discs if desired.
They keep well for a week in an airtight container. (They can be kept longer than this as fruitcake keeps for a long time but due to their small size they can start to dry out after a week).
Makes 35 bite size fruitcakes

Honeyed Chocolate Truffle Squares on Tuile Biscuits
I had to include something rich and chocolaty for the chocoholics in my family and these little truffle squares were ideal. You can flavour the chocolate truffle any way you wish but I decided to use a little blossom honey to add a floral note and a touch of sweetness. Adding a small amount of liqueur, the zest of an orange or some strong espresso would also be good. As the truffles were being served with the rest of the afternoon tea treats, I decided to make some small tuile squares on which to serve them. This made them easier to pick up and eat, as the truffles can turn slightly soft if they are left out for more than half an hour and I didn’t want people getting chocolate over their fingers – not ideal for an elegant tea party!

If you don’t want to make the tuile biscuits, dusting the truffle squares in cocoa powder will make them the perfect petit fours to serve with coffee after a dinner party.

Chocolate Truffles
100g dark chocolate (70% cocoa)
100ml double cream
1 level tbsp blossom/runny honey

Method
Heat the cream and honey in a small saucepan or microwave until hot, but do not allow to boil.
Break the chocolate into pieces and add to the cream. Stir gently until smooth.
Pour the mixture into a small 15cm square shallow tray or container, which has been fully lined with clingfilm.
Allow to cool to room temperature before refrigerating for 2 hours.
Once chilled, remove the chocolate truffle sheet from the tray with the help of the clingfilm. Use a long sharp knife to cut the truffle into 1cm squares. Clean your knife with a sheet of kitchen roll between each cut to get neat squares.
Chill the squares until required.
To assemble, place each truffle square on top of a tuile square and serve immediately.

Tuiles
(Recipe from the Daring Bakers January challenge)
Ingredients
30g softened butter
30g sifted icing sugar
½ tsp vanilla extract
1 egg white
33g plain flour

Method
Preheat the oven to 180C. Cream the butter, sugar and vanilla to a paste. Gradually add the egg white, white continuing to beat.
Add the flour, a teaspoon at a time until you get a smooth batter/paste. Cover the bowl with clingfilm and chill in the fridge for 15 minutes to firm up.
Line a baking sheet with parchment paper.
Cut out a small square from card to act as a stencil, making sure its about 1cm larger than your chocolate truffle squares. Place the stencil on the baking sheet and use an off sided spatula or small knife to spread over a thin layer of the paste before carefully removing the stencil. Leave some room in between your shapes.
Bake for about 4-5 minutes until crisp and golden. Watch them carefully as they can burn quite easily.
Meanwhile, prepare the next batch of tuile paste squares on a new piece of baking paper, ready to bake once the first batch is cooked (this saves time).
When the tuiles are baked, lift the baking paper off the baking sheet and replace with the next batch of tuile paste squares and bake as before.
Continue until you have enough squares.
They will keep for 3 days in an airtight container.

Thursday 5 November 2009

Good Things Come In Unexpected Packages

Today I received a wonderful surprise. When the postman knocked on the door and handed over a parcel that was addressed to me I was intrigued as I hadn’t ordered anything. I was even more intrigued when I saw it came from Mexico!

To my excitement, I soon discovered it was from the lovely Monica at Lick The Bowl Good. I had commented on her blog a few weeks back that I was unable to find proper American Candy Corn sweets and being the lovely person that she is, she sent me some, along with some other Halloween themed goodies for me to try! How thoughtful is that! I’m particularly excited by the caramel apple flavoured Candy Corns – how did she guess I loved all things apple-y?

Thank you so much Monica, I’m really touched. You’ve brightened my day.