Friday 30 July 2010

Feeling Fruity? – Jordans Cereals New Frusli Bar

I was recently asked if I would like to sample the new Frusli bar from Jordans and upon hearing that it was apple, sultana and cinnamon flavour – some of my all time favourite things (see name of blog!) I was only too eager to accept.

The box arrived yesterday, a little battered but the bars inside had come to no harm. I liked the bright green packaging which instantly made me think of green apples and grapes.

Once unwrapped, the use of whole oats is instantly apparent. As were the sultanas and thin slivers of apple, complete with their red skin. There were also little gooey dark brown blobs which turned out to be pureed apple flavoured with cinnamon.

So how did it taste? It was very fruity and the apple and cinnamon flavours although quite subtle at first, developed as you ate. I would have liked the cinnamon to be used throughout the whole bar rather than just in the gummy pieces, but this is just because I’m a cinnamon fanatic. It reminded me a bit of a caramel apple pie, only with honeyed oats instead of pastry. However, the bar itself was very sweet, chewy and sticky – almost too sweet for my liking. This isn’t necessarily down to too much added sugar, as they also use honey and the concentrated apple puree for sweetness, which is good, but still resulted in a really sweet taste and about half way through I found I could no longer appreciate the actual fruit flavours which was a shame.

I loved the texture the raw oats added to the bar. As you chewed they released a creamy oatiness that helped combat some of the sweetness and I was pleased to read they were British oats.

Overall I’m undecided by these bars.
Good bits – Loved the British oats, real apple slivers, cinnamon flavour and high fruit content.
Not so good bits – overly sweet which overpowered the fruit flavours.

Jordans make plenty of other products which I adore, so maybe my excitement at an apple and cinnamon bar rose my expectations too high. It’s probably best to try these bars yourself and make up your own minds.

Tuesday 27 July 2010

Daring Bakers July 2010: Chocolate, Raspberry & Hazelnut Swiss Roll Ice Cream Cake

The July 2010 Daring Bakers’ challenge was hosted by Sunita of Sunita’s world – life and food. Sunita challenged everyone to make an ice-cream filled Swiss roll that’s then used to make a bombe with hot fudge. Her recipe is based on an ice cream cake recipe from Taste of Home.

Just reading about this challenge bought a smile to my face. Here was a dessert that I had been meaning to attempt for ages but had been putting off in favour of some easier desserts. As it was this month’s challenge, I knew it was time to take the whisk by the handle and get baking.

When reading the recipe I felt a little uneasy as it consisted of so many components. We had to make a Swiss roll filled with cream and frozen, two different flavours of ice cream, layered inside the Swiss roll slices and around a hidden fudge centre – yikes!

I was most nervous about the ice cream components as I don’t have an ice cream maker and have tried making ice cream by the home freezing, stirring, freezing process before with limited success. However, I soon discovered that this recipe didn’t require the egg based ice cream variety, but relied on freezing flavoured cream to produce the ice cream which is much better behaved for home freezers.

We were provided with recipes for chocolate Swiss roll, chocolate and vanilla ice creams and a chocolate fudge centre, all of which had to be made from scratch. However, we were allowed to choose our own flavour combinations which was great as I love coming up with different flavour combinations.

I decided to stick with the chocolate Swiss roll as the outside layer, as I loved the colour contrast between the chocolate sponge and the white cream filling. My first ice cream flavour choice was raspberry as I have recently found a bottle of pure raspberry syrup which is so intensely raspberry that I knew it would go wonderfully with the chocolate.

To complement both the chocolate and raspberry flavours I decided to make my second ice cream hazelnut. I achieved this by added chopped roasted hazelnuts to a vanilla ice cream base. I also stirred in some Frangelico (an amazing hazelnut liqueur). The resulting ice cream was divine! Silky smooth and creamy, unsurprisingly due to the cream but with the slight crunch from the nibs of toasted hazelnut and the liqueur flooded your senses with hazelnut flavour – just gorgeous. The main thing to take note of is that by adding the alcohol, the ice cream will not set completely solid, which is great for eating but rather tricky when trying to layer it into a dessert!

Finally I stuck with the chocolate fudge centre as both my ice creams where quite pale in colour and I wanted the hidden centre to really stand out and add a wow factor when the finished cake was cut into. The fudgy sauce itself was delicious, so thick and glossy, I bet it would be great drizzled warm over profiteroles.

Making all the components and assembling the cake took time, especially the hourly mixings of the ice creams while they were freezing, but none of it was too tricky and I was able to complete the dish from start to finish in one day. I had plenty of time to get on with my other jobs in-between and the results were definitely worth the effort.

The dessert looked yummy when I unmolded it. The swirls of Swiss roll making it look quite elegant with little streaks of the pink raspberry ice cream peeking out between the gaps. I cut into it using a knife, unsure what to expect but the results were far better than I had hoped!

WOW! I loved how it turned out. The Swiss roll outer layer gave the edge a two toned stripy effect that reminded me of a zebra. Just inside this was the pale pink raspberry ice cream with the paler nutty hazelnut ice cream at the base. The centre of chocolate fudge came out perfectly formed – I’ve no idea how that happened as it sort of sunk into the ice cream when I added it. Magic! I loved how it really stood out against the ice cream layers and yet tied in with the chocolate sponge edge. It really added a wow factor.

How did it taste? Only one word needed – Divine! Silky smooth and creamy, fruity and nutty with the occasionally crunch texture from the chopped hazelnuts. The Swiss roll had stayed surprisingly soft and the fudge centre was rich and sticky.

Yes it is completely cream and calorie laden but for a dessert this good I don’t care! Just what you need on a hot summer day and it’s sure to impress any guests you might have over for a BBQ. Thanks Sunita for choosing such a fabulous dessert. Click to see the Daring Bakers blogroll.

Chocolate, Raspberry & Hazelnut Swiss Roll Ice Cream Cake
(Inspired by the recipe of the same name from the Taste of Home website)
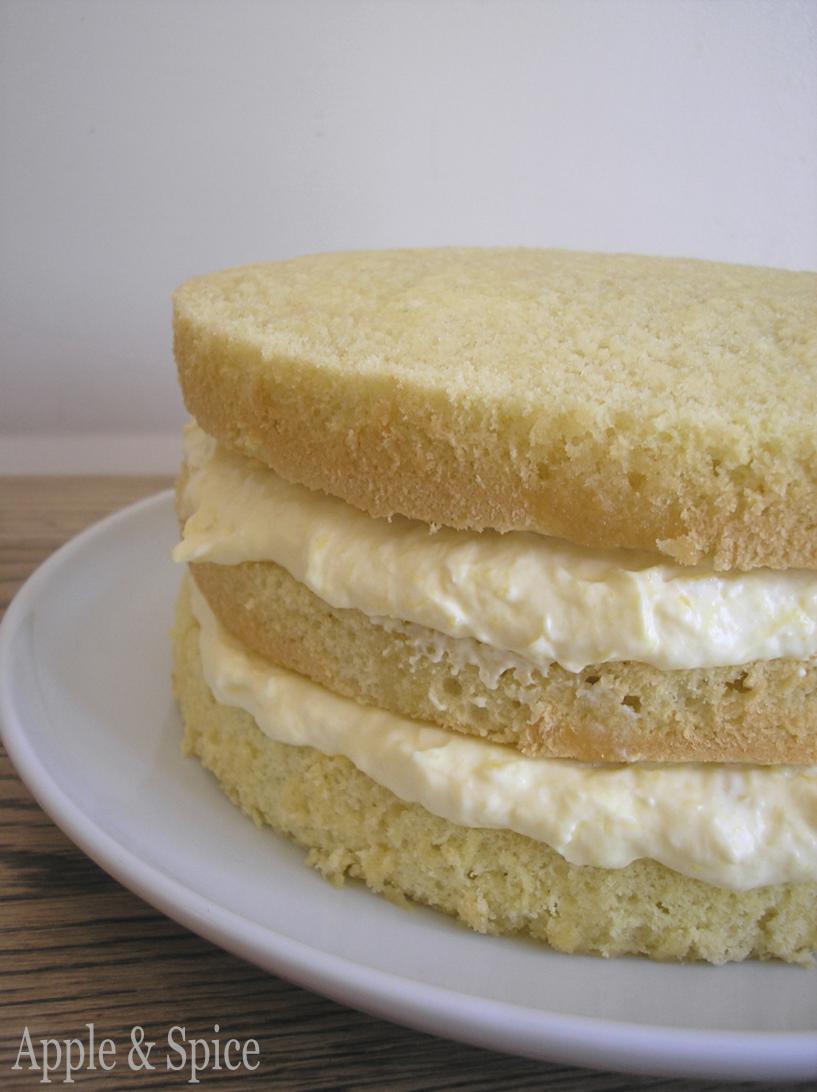
Chocolate Swiss Roll
3 eggs
110g caster sugar
25g plain flour
20g natural unsweetened cocoa powder
15ml boiling water
A little oil for brushing the pans
For the filling-
250ml whipping cream
½ tsp vanilla extract
30g icing sugar

Method
Preheat the oven to 200C. Brush a Swiss roll tin (11x9 inches) with a little oil and line with greaseproof baking paper.
In a large mixing bowl, add the eggs and sugar and beat till very thick, about 10 minutes. When the beaters are lifted, it should leave a trail on the surface.
Mix the flour and cocoa powder together and sift it over the whisked egg mixture, in three batches and fold in gently with a spatula, making sure to reach down to the base and around the sides. Finally fold in the hot water.
Spread the mixture into the baking pans and spread it out evenly.
Bake for about 10-12 minutes or till the centre is springy to the touch. It will still be quite soft and squishy due to the nature of the cake.
Spread a tea towel on the counter and sprinkle a little caster sugar over it. Flip the cake out of the pan and onto the tea towel. Carefully peel off the greaseproof paper and leave the cake to cool.
Starting from one of the longer sides, start to make a roll with the towel rolled inside. Leave until cool.

To make the Filling
In a large bowl, add the cream, vanilla and icing sugar. Beat until quite thick.
Unroll the cake from the tea towel and spread it evenly with the cream, leaving a ½ inch border around the edge to allow for spreading when re-rolled.
Roll the cake up again, using the towel to help you but don’t roll the towel into the sponge. Transfer the roll to a sheet of clingfilm and wrap it up well. Transfer the roll to a plate or tray and place in the fridge to chill until firm.

Raspberry Ice Cream
300ml whipping cream
½ tsp vanilla extract
55g caster sugar
3 tbsp raspberry syrup/coulis

Method
In a mixing bowl, add the cream, vanilla and sugar mixture and whisk lightly till everything is blended together. Add the raspberry syrup or coulis and mix in well.
Pour into a freezer friendly container (I used a small tupperware box) and freeze till firm around the edges, about an hour. Remove from the freezer, mix well so it all becomes incorporated and smooth. Return to the freezer for a further hour before repeating the process. It may need a third hour depending on your freezer and container used. (You could use an ice cream maker if you are lucky enough to have one).

Hazelnut Ice Cream
250ml whipping cream
30g caster sugar
1½ tbsp Frangelico (hazelnut liqueur)
25g roasted hazelnuts

Method
Chop the roasted hazelnuts until quite fine. Place the cream, sugar and Frangelico into a large bowl and beat until slightly thick. Add the chopped hazelnuts and fold in to mix.
Pour the mixture into another freezable container or ice cream maker. Freeze for an hour, stir it together again and freeze for another hour. Repeat until the mixture is very thick and nearly solid. (The added alcohol will prevent it from freezing completely solid)

Chocolate Fudge Sauce Centre
50g caster sugar
10g natural unsweetened cocoa powder
1 tbsp cornflour
170ml water
7g butter
½ tsp vanilla extract

Method
In a small saucepan, whisk together the sugar, cocoa powder and cornflour until no lumps are visible. Slowly whisk in the water until combined and to prevent lumps from forming.
Place the pan over the heat and stir constantly until it begins to thicken, about 2 minutes.
Remove from heat, beat in the butter and vanilla and set aside to cool.

Assembly
Line a pudding basin or deep bowl with a large sheet of clingfilm.
Cut the Swiss roll into 10-12 equal slices, approximately 2cms each. Arrange two slices at the bottom of the bowl, with their seam sides facing each other. Arrange the Swiss roll slices up the sides of the bowl, right to the top. Cover the bowl with clingfilm and freeze until the slices are firm, about 30 minutes.
Take your nearly frozen raspberry ice cream out of the freezer and spread it over the base and up the sides of the Swiss roll lined bowl.
Cover the bowl with clingfilm and freeze until firm, about 1 hour.
Once set, add the cooled fudge sauce over the raspberry ice cream, in the base only, not up the sides. Return to the freezer for another hour.
Soften the hazelnut ice cream (if needed) and spread it over the fudge sauce, filling the bowl completely to the top in line with the top of the Swiss roll slices. Cover with clingfilm and freeze for at least 4-5 hours until completely firm and well set.

To Serve
Remove the bowl from the freezer and place a serving plate on top. Turn it upside down and remove the bowl with the help of the clingfilm. If the bowl does not come away easily, wipe the outsides of the bowl with a kitchen towel dampened with hot water and try again.
Leave the cake for 10 minutes to soften slightly and then cut slices using a sharp knife, warmed by dipping it in hot water first.
Eat and enjoy. Serves 6-8

Friday 23 July 2010

Summer Pudding

This is the perfect summer dessert to enjoy on a warm summers day and a great way of using some of the fruit I picked at Grove Farm recently. It encapsulates all the vibrant, zingy, fresh, fruity, sweet flavours of summer berries to form a truly divine dessert. It’s amazing how gently heating the summer fruits and encasing them in a bread lined bowl can transform already wonderful tasting berries into something truly spectacular.

When you think about it – mushed up berries encased in soggy bread – it doesn’t sound particularly appealing but in reality it’s fabulous. The berries juices are a vibrant red, shiny and glossy while the fruits are soft and sweet, their natural summery flavours personified by being tumbled together, while the gentle heating breaks down their sometimes tough outer skins.

The colour and flavour of the berry juices is outstanding. I even used some of the leftover drizzled on my morning cereal and yogurt.

The bread eagerly absorbs the fruits juices while retaining just enough of its structure to remain intact when turned out. Cutting a slice reveals the mingled berries tucked inside as they tumble out in a pool of their own glossy juices.

As I knew this particular summer pudding was to be enjoyed by adults only I decided to add a bit of extra indulgence to the pudding – black cherry liqueur and Crème de Cassis (blackcurrant liqueur). Not too much, I didn’t want to actually taste the alcohol, only highlight and deepen the fruitiness of the berries.

I used the cut off crusts of bread to mop up the little blobs of berries and juices I had managed to spread around the kitchen and oh boy did it taste gooooood. I was almost tempted to do away with the chilling and firming stage and just dig straight in but with no pets or small children to use as scapegoats I managed to restrain myself until later when I enjoyed it with my family. It was worth the wait.

So simple, so summery, so unbelievably good and it’s healthy too! It has to be one of my favourite ways to enjoy the summer berry bounty. I urge you to give it a go. If you’d like to make mini individual ones, click here to see last years post.

Summer Pudding
Ingredients
400g strawberries
250g raspberries
200g blackcurrants
100ml water
100g caster sugar
6 slices of white bread
1 tbsp black cherry liqueur or Kirsch
1 tbsp Crème de Cassis

Method
Sort through the raspberries and blackcurrants and remove any bits of twig or leaf before placing them into a saucepan. Destalk the strawberries and cut them into halves or quarters so they are about the same size as the raspberries. Add to the pan with the rest of the fruit.
Pour over the water and heat gently for 15-20 minutes, stirring occasionally until the fruits start to break down and release their juices.
Stir in the sugar and allow to simmer for 10 minutes. Then stir in the cherry liqueur and Cassis and remove from the heat.
Pour the berry mixture into a sieve placed over a bowl to catch the fruits juices. Transfer the juice – minus its fruit back into the saucepan. Bring the fruit juices to the boil then allow to bubble for 1-2 minutes until slightly reduced and syrupy. (You want to do this after removing the fruit so some of the fruit remains intact).
Remove the fruit juice from the heat and allow to cool slightly.
Slice the crusts off the slices of bread and cut one slice in half. With another slice, cut out as large a circle as the bread will allow, ideally about 4inches, for the base of the bowl. You will need about 3½ slices to line the sides of the bowl, the circle for the base and the remaining 1½ slices for the top. You can check if you have enough by testing it out in the bowl or pudding basin you are going to use.
Your glass bowl or pudding basin should be 6inches wide at the top and 3inches at the base and about 3inches deep.
Dip the base circle of bread into the glossy fruit juices in the pan, don’t leave it for long or else it will go too soft to handle. Turn the bread over to soak the other side before placing it into the base of your bowl or basin.
Dip the side slices of bread in the juices, one at a time and use them to line the sides of the bowl, overlapping them slightly so there are no gaps.
Once fully lined, pour the strawberries, raspberries and blackcurrants into the centre, smoothing out the surface. It should reach nearly to the top of the bowl.
Dip your final 1½ slices of bread into the fruit juices and arrange over the top of the fruit to act as a ‘lid’ (save the rest of the fruit juices to serve with the pudding later). Gently press down the side pieces of bread, over the top of the ‘lid’ and cover the top of the bowl with clingfilm.
Place a small plate or saucer on top of the pudding and weigh it down with something heavy, weights from your scales or large tins of tomatoes are ideal.
Place the bowl on a small tray to catch any juices that may seep up and out of the pudding while it rests. Place in the fridge for at least 4-6 hours to chill, condense and firm up.
Once ready to serve, remove the clingfilm and run a small round bladed butter knife around the top edge of the bowl to loosen any fruit juice than might have air dried slightly and gone sticky.
Place a large serving plate over the top and flip the whole lot over. Give the pudding basin a little shake and the summer pudding should release from the bowl and hold its shape well. Drizzle over some of the reserved juices.
Serve in generous slices with some more of the reserved juices and cream or ice cream if desired.
Serves 6-8

Tuesday 20 July 2010

The Cake Slice July 2010: Key West Cake with Mango Mousse and Ginger Lime Cream

I was really excited when this cake got chosen as this months Cake Slice cake. It’s one I had been longing to bake for ages, the ingredients sounded so fresh and tropical – mango, fresh ginger and lime – and yet it is not a combination I have together in a cake before. The cake also called for a rum syrup to be drizzled over the cake layers before assembly which just made it appeal even more.

The cake requires quite a bit of work due to its many components – cake, rum syrup, mango mousse and ginger lime cream. The ginger lime cream also calls for you to make your own ginger lime curd which may sound a bit of a nuisance but I can assure you the results are completely worth the extra effort. In fact this curd turned out to be my favourite part of the cake, so much so that I plan on making it again and eating it just as curd. It was so fresh and zingy with the lime zest and juice and the ginger was just subtly there in the background, delicious. We were meant to pass the curd through a fine sieve to remove the zest once cooked, but I decided to skip this step as I liked seeing the green zest speckled through the curd, so pretty. Plus, I’m sure it added to the flavour.

The cake layers contain very little butter and the main volume of the cake comes from whisking eggs and sugar over a pan of hot water until ribbons form. This produces and very light and airy cake which has a springy bounce when pressed. The batter was quite thick and sticky and reminded me strongly of choux pastry dough.

Using rum syrup to soak the cake layers kept them wonderfully moist and added a lovely tropical flavour against the mango and lime. If you didn’t want to use alcohol I’m sure replacing this with pineapple juice would be equally tasty.

The mango mousse called for gelatine to help it set firm. Being a vegetarian I left this out completely and just replied on chilling the whipped cream mixture to help my cake set. I know you can get vegetarian style gelatine, but when you have lots of whipped cream I always think this is unnecessary. Plus, I don’t like the jellied texture it gives. Setting the cake in the fridge for a while does the same sort of job, as the cream firms up as it cools.

Overall I adored this cake. It was light, fresh and fruity, perfect for this time of year and I had fun learning some new techniques along the way. Click here to see my fellow Cake Slice bakers and their cakes.

Key West Cake with Mango Mousse and Ginger Lime Cream
Recipe from Sky High Irresistible Layer Cakes by Alisa Huntsman and Peter Wynne
Cake
6 eggs
225g caster sugar
1 tsp vanilla extract
300g plain flour
45g unsalted butter, melted and slightly warm

Rum Syrup
55g caster sugar
110ml water
55ml rum

Mango Mousse
350g finely diced mango (use tinned if fresh is not available)
75ml water
75g plus a separate 20g caster sugar
2 tsp unflavoured gelatine powder
2 tbsp light rum
225ml double cream

Ginger Lime Cream
4 egg yolks
110g caster sugar
Zest of 1 lime
55ml freshly squeezed lime juice
1 tbsp grated fresh ginger
330ml cold double cream

Cake Method
Preheat the oven to 180C. Line the base of three 8inch round pans with parchment or waxed paper.
Place the eggs in a large heatproof bowl. Gradually beat in the sugar and the vanilla. Set over a pan of simmering water and whisk constantly until all the sugar dissolves and the eggs are warmer than body temperature. Remove from the heat and, with the mixer on medium high, whip the eggs until very fluffy and stiff enough so that a slowly dissolving ribbon forms from the dripping batter when the beaters are lifted.
Sift the flour and return to the sifter. Carefully sift about a third of the flour over the top of the eggs. Using a rubber spatula, gently fold it in. Repeat with the remaining flour, folding just until blended evenly. Finally, drizzle the butter over the batter and carefully fold it in. Divide the batter among the 3 cake pans.
Bake the layers for 12 to 14 minutes or until a cake tester comes out clean. Transfer to a wire rack and let the cakes cool completely in their pans. To unmold, run a blunt knife around the rims to carefully release the edges of the cakes and tap them out gently. Carefully remove the paper on the bottom of each layer.

Rum Syrup
Combine the sugar and water in a small saucepan. Cook over a medium heat, stirring to dissolve the sugar. Boil until the syrup is reduced by half, about 110ml. Remove from the heat and add the rum.

Mango Mousse
Place the mango chunks in a medium nonreactive saucepan. Add the water, bring to a simmer and cook, stirring occasionally, until soft, about 10-15 minutes. Remove from the heat and let cool to room temperature.
Transfer the cooled mangoes, along with any liquid, to a blender or food processor. Puree until smooth. Remove 120ml of the mango puree, stir in 20g of sugar and set aside to use as garnish. Place the remaining mango puree (about 220-250ml) in a large bowl.
Put the gelatine in a small glass or ceramic dish. Add the rum and let soften for about 5 minutes. With a microwave on low, heat the gelatine until dissolved, about 10 seconds.
Whisk the gelatine and remaining 75g sugar into the mango puree until all the sugar dissolves.
In another large chilled bowl, whip the cram until stiff. Using a rubber spatula, fold the cream into the sweetened mango puree.

Ginger Lime Cream
Whisk the egg yolks in a small, heavy nonreactive saucepan. Gradually whisk in the sugar, then the lime zest, juice and ginger. Cook over a medium low heat, stirring and scraping the base of the pot with a spatula, until the yolks visibly thicken, about 3-5 minutes.
Strain through a fine mesh sieve to remove the zest and ginger chunks. Cover the ginger lime curd with plastic wrap, pressing it directly into the surface and refrigerate until very cold, about 1 hour.
In a large mixing bowl, whip the ream until stiff. Fold the whipped cream into the ginger lime curd.

To Assemble
Place one cake layer on a cake stand, flat side up. Soak it with 55ml of the rum syrup. Spread half the mango mousse over the layer evenly. Repeat with the second cake layer using another 55ml syrup and the remaining mousse. Add the last cake layer, soak with the last of the rum syrup and chill the cake for about 1 hour.
Once firm, frost the cake with the ginger lime cream. Use a pastry bag fitted with a star nozzle to decorate the cake with the remaining cream. Serve the cake with a spoonful of the reserved mango puree from earlier.

Wednesday 14 July 2010

The Joys of Picking Your Own

Now the sunny weather is here all sorts of fruit and veg has sprouted, blossomed and grown and is now ripe for the picking. Last weekend was a particularly sunny day and I spent a most enjoyable afternoon at a Pick Your Own farm, doing just that – picking my own fruit and veg.

I went with my mother and grandmother to Grove Farm, which is about an hours drive away but well worth the trip. They sell different fruits and vegetables over a 4-5 month summer period depending on what’s in season and growing at that moment. When we visited they had strawberries, raspberries, blackcurrants, fresh peas, spinach, new potatoes, beetroot, broad beans and carrots.

The fun thing is that when they say Pick Your Own they really mean it, as you are provided with a wheelbarrow, bags, boxes and a spade and sent to trundle through the surrounding fields and bushes, digging up and collecting the produce to your hearts content.

It can’t get any fresher than actually pulling your own carrots and beetroot directly out the ground! The intensity of carrot flavour is a just picked carrot is unbelievable!

The sun was shining as all three generations of our family chatted while lifting the leaves of the strawberry plants, hunting out the plump red fruits hidden underneath, sampling the odd one just to check their ripeness.

We came away laden with fresh produce – I see plenty of salads and fruity treats ahead! There are quite a number of PYO farms dotted around and I highly recommend hunting them out. The produce is often far cheaper than the supermarkets and aside from growing your own, you won’t find fresher or more local produce.